You're hosting LightTag on your own infrastructure to ensure security and compliance. This guide will walk you through securing your LightTag-on-AWS instance. Particularly, we'll cover setting up SSL/TLS (https) and limiting access points to the instance.
With LightTag-on-AWS, you are in full control and fully responsible for securing your instance. This guide demonstrates a general method to secure your instance, but you should implement security measures that are consistent with your organizations practices and networking topology.
Adding SSL with an AWS ELB
Prerequisites
To add SSL you'll need
-
A domain you'll be serving LightTag from.
-
An SSL certificate assigned to that domain.
This guide assumes your domain is registered in AWS Route53. If you don't already have an SSL certificate, you can provision one (for free) using AWS Certificate Manager
The simplest way to set up SSL for LightTag on AWS is to use an ELB. The steps to achieve this are
-
Provision a new ELB in the same VPC as your LightTag instance.
-
Configure the ELB to forward HTTPS traffic to your LightTag instance
-
Configure the ELB to redirect HTTP traffic to HTTPS
-
Limit trafic to your instance to only come from the ELB
Provisioning an ELB
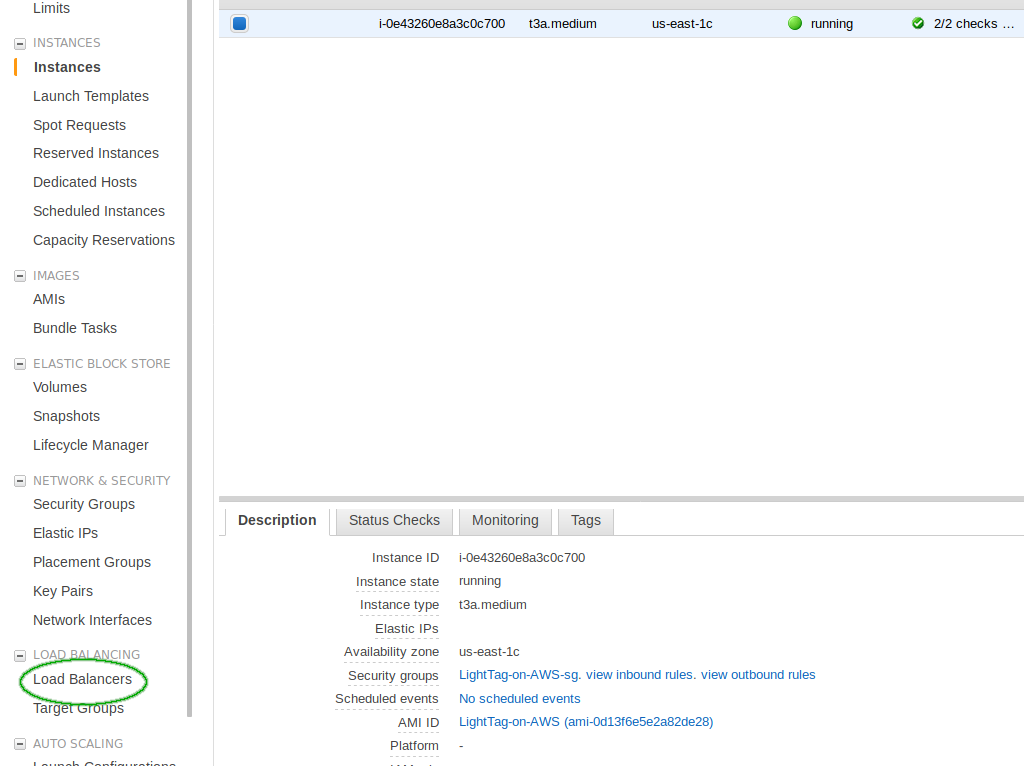
Go to the EC2 Console and find your LightTag instance. Select it and note the VPC-ID, Availability Zone and security group of your instance.

On the left hand side of the console, go to load balancers
Press the Add Load Balancer button, then select Application Load Balancer. You'll arrive at the Configure Load Balancer screen
-
Give your Load Balancer a descriptive name
-
Press the Add Listener button and add an HTTPS listener
-
In the VPC section, select the VPC you noted before, where your instance is located
-
Select two subnets, such that one of them corresponds to the availability zone you noted before.
Your configuration should look like this:
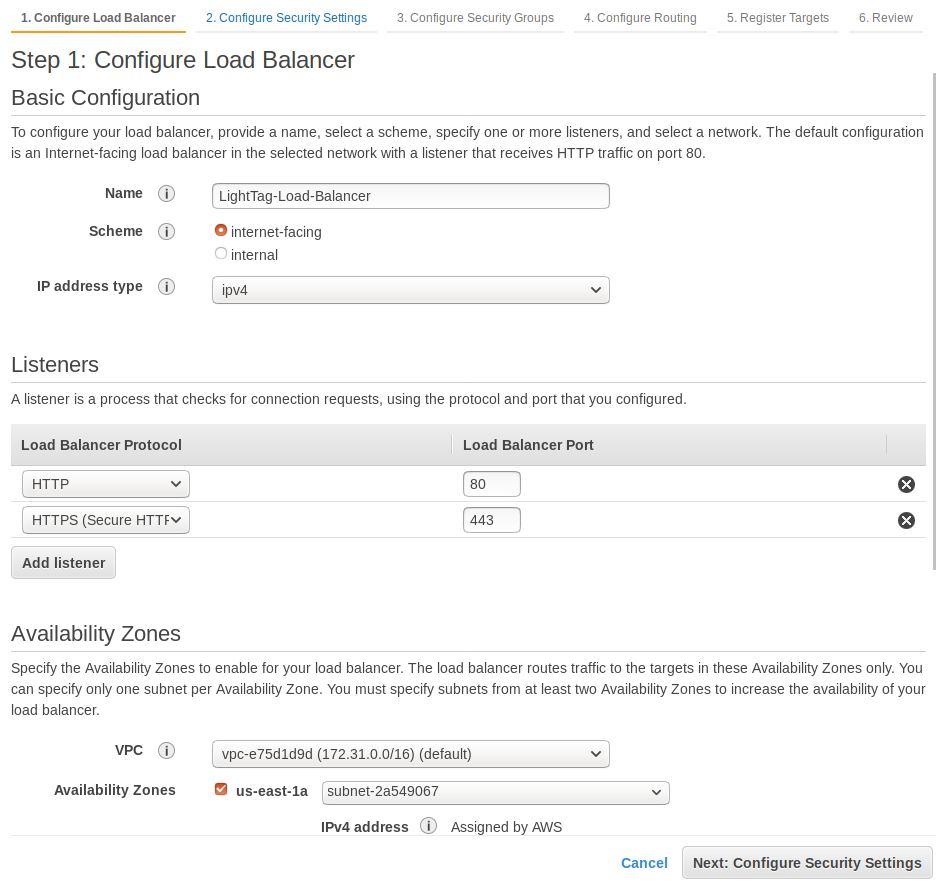
Click Next, then select a certificate you'll use for SSL

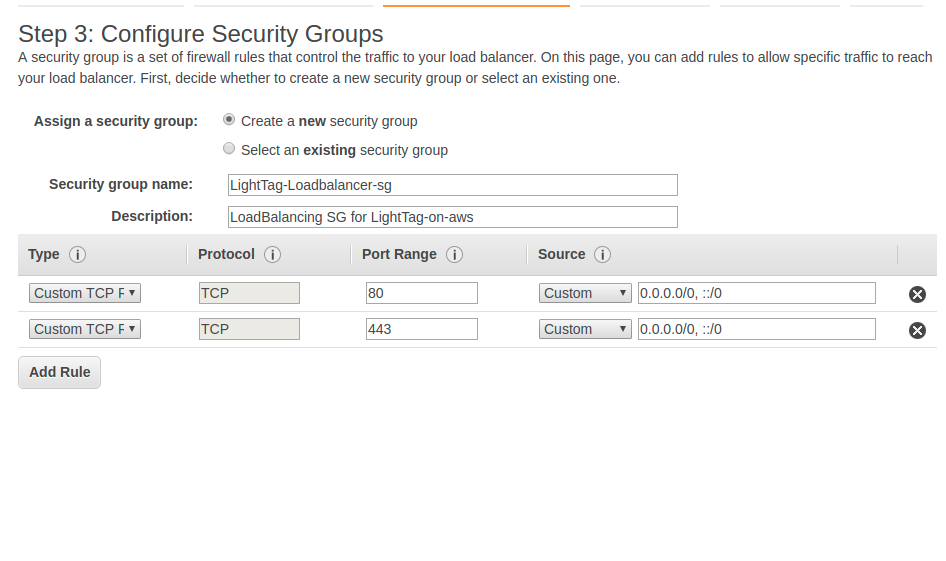
In the Configure Security Groups section, create a new Security group that accepts traffic on ports 80 and 443 (the defaults). Give it a descriptive name
In the Configure Routing Section, create a new Target Group with target type instance. Leave the other values in their default.
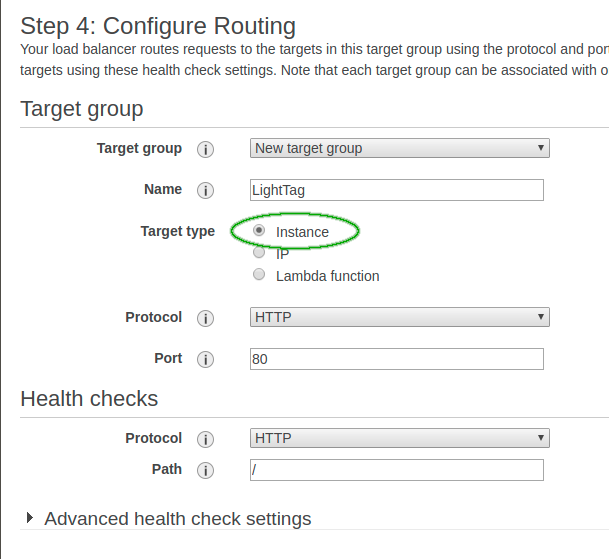
Click Register Targets then select your LightTag Instance
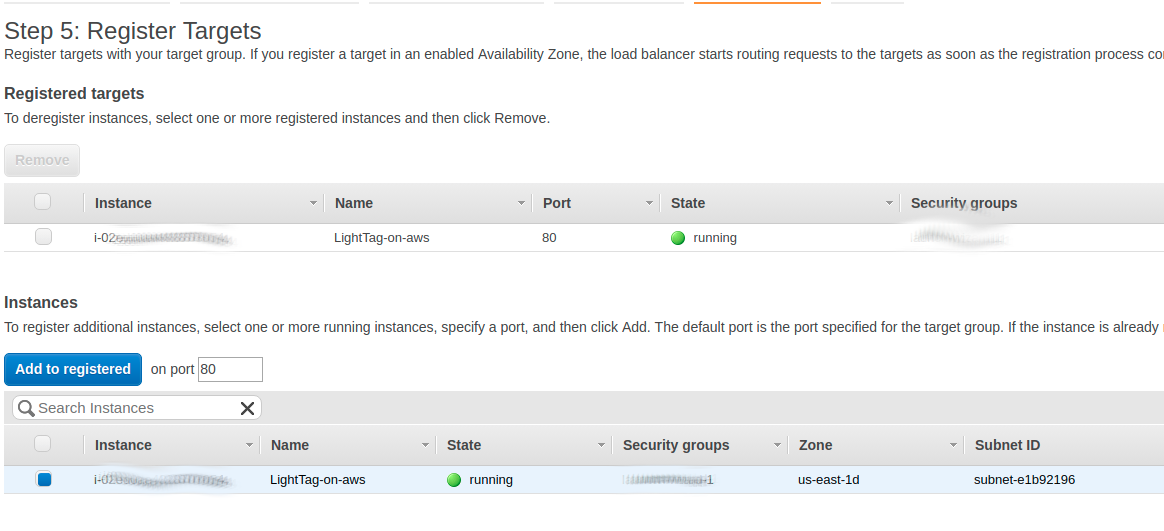
Then review and create your load balancer.
Redirect HTTP Traffic to HTTPS
To ensure all of your users always use SSL, we'll configure the Load Balancer to redirect all HTTP requests to HTTPS.
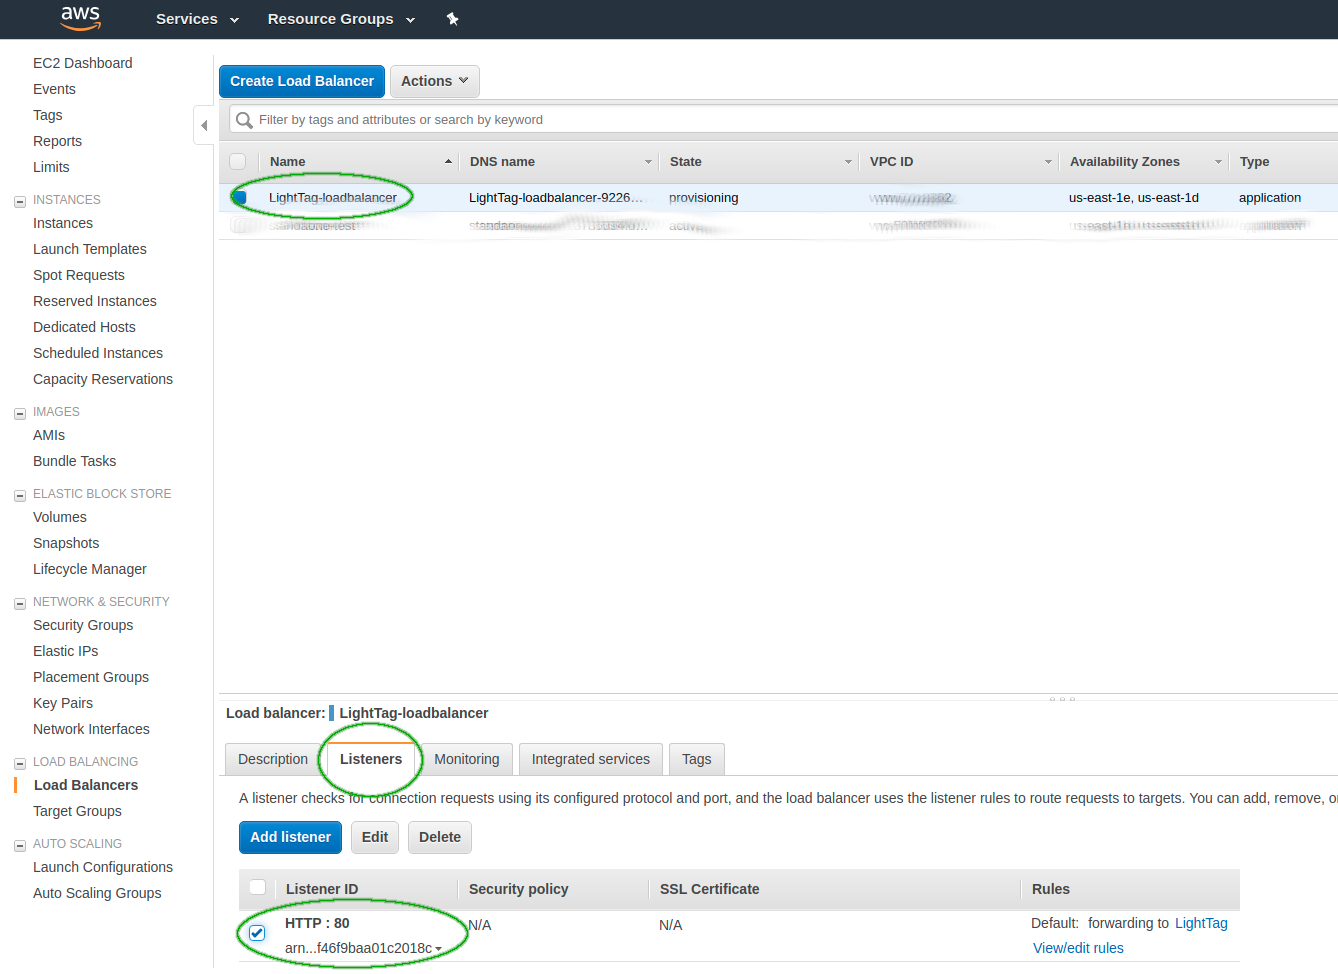
To do so, go to the Load Balancers section in the EC2 Console and select the Load Balancer you just created. Then open the listeners tab on the bottom.
Choose the HTTP:80 listener and click edit.
Delete the default action
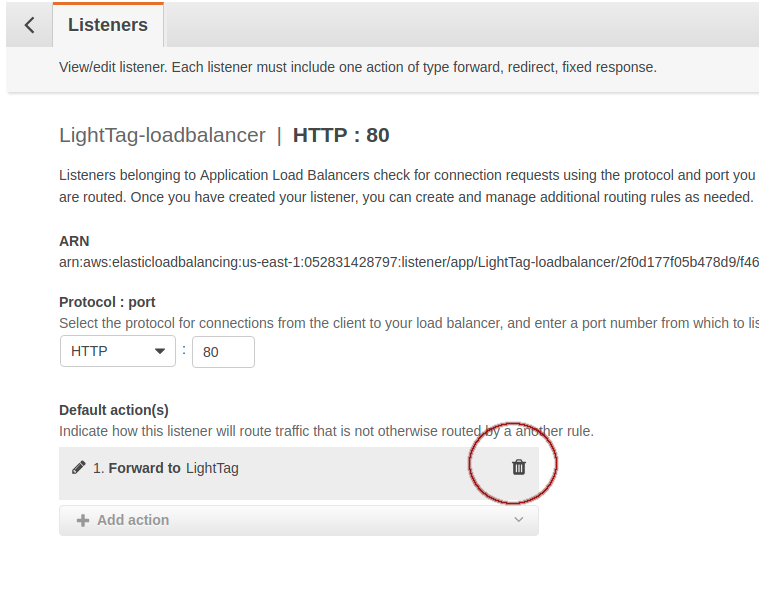
Now add a new action, to redirect requests to https. To do so
-
Click Add Action
-
Select "Redirect To"
-
in the port field type "443"
-
Click the checkmark
-
Then click update at the top right
Pointing Our DNS at Our Load Balancer
We now have a Load Balancer that will redirect traffic from HTTP to HTTPS and use the SSL certificate we set up. The next step is to make a DNS record that points to the Load Balancer.
AWS has already documented this process here.
Restricting Traffic to our instance
When we originally provisioned the LightTag-on-AWS instance, we left a security group open that allows traffic from the internet to the instance. We will now remove that, allowing traffic to only come from the Load Balancer.
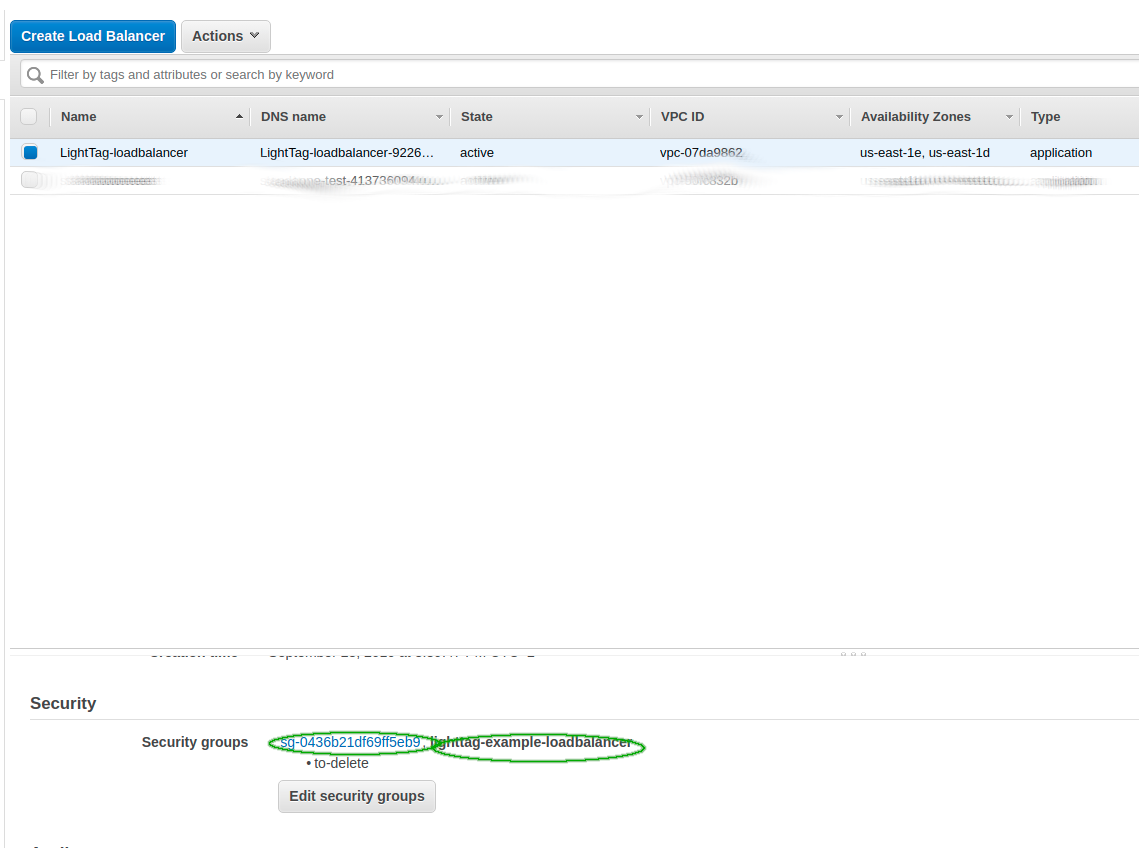
To do so, take note of the name and id of the security group assigned to your load balancer.
-
In the load balancers section of the console, select your load balancer, then scroll down in the descriptions tab to the security section
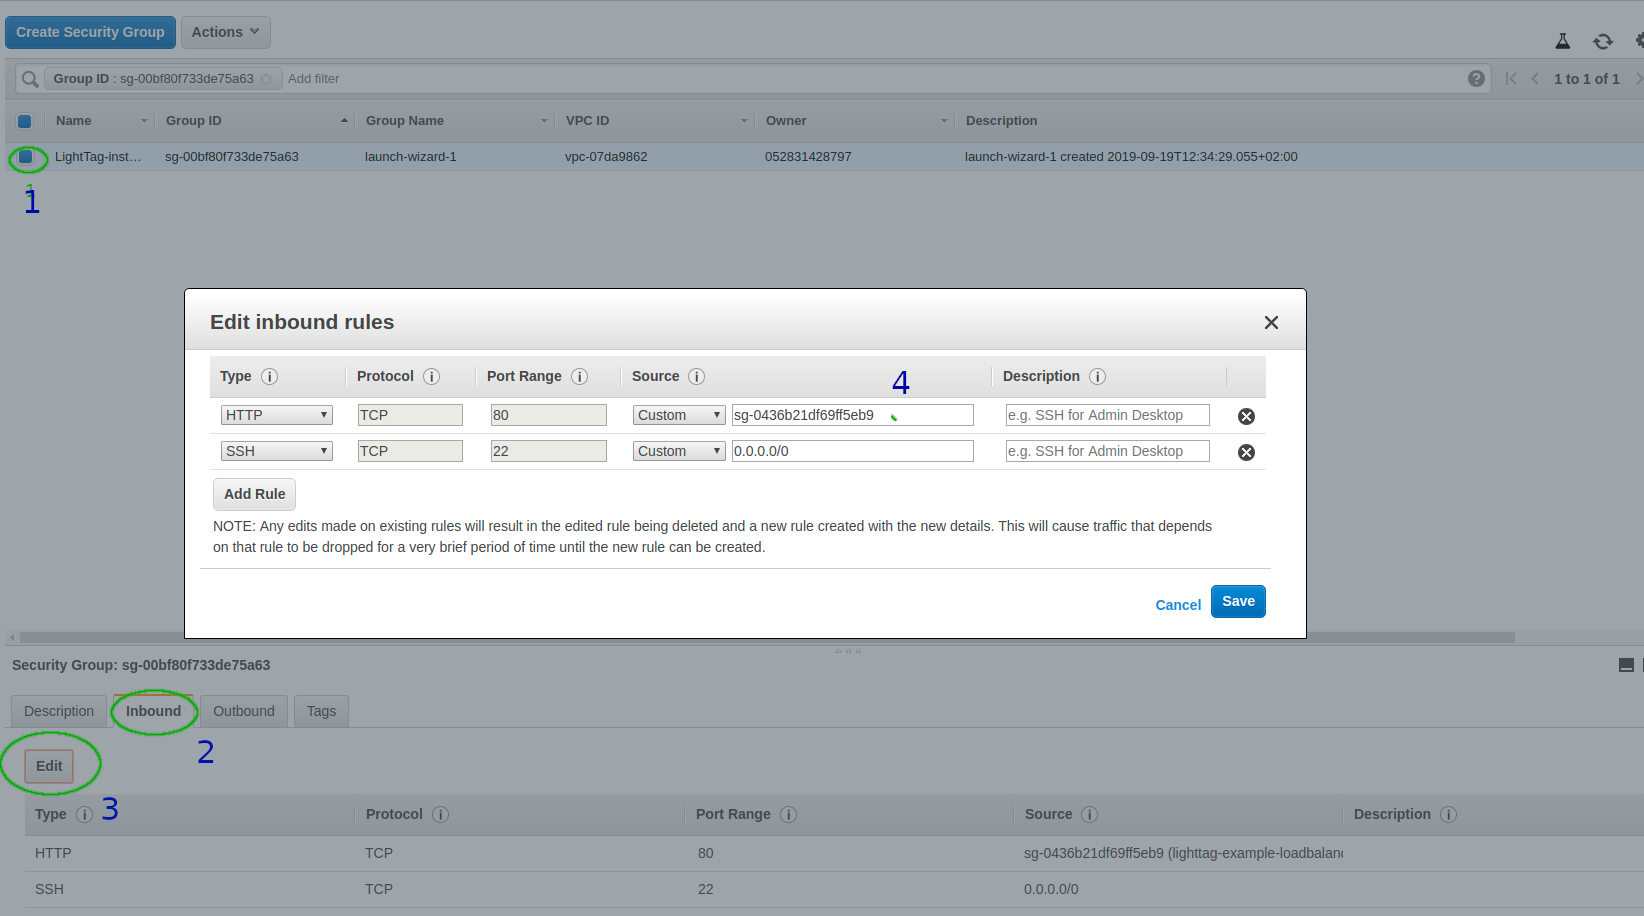
Now go to the main page of the EC2 console then .
-
, select your instance and click on the security group assigned to it
-
Click on the inbound tab at the bottom
-
Click Edit
-
In the row for HTTP, change the source tab to be the ID of the Load Balancer Security group from the previous step
That's it you're done. Now test it. Visit the domain you configured in Route53 and you should see a lock in the address bar, indicating that the site is secured with SSL.